Monday, 5 August 2013

How to Take a Slow Motion Video on the HTC One

Although HTC puts the aluminum construction of the HTC One front and center in most of its advertisements, the device’s picture and video capture abilities are just as impressive as the device’s build details.
The HTC One’s PixelSense camera is great at allowing users to control almost everything about the media they are capturing. These settings actually allow you to even adjust the speed at which video is captured and played back, so that you can create cool highlight reels and small sharable memories of family members and places you’ve been. In this how to, we’ll show you how to take a slow motion video on the HTC One.
Unlock your HTC One device and open the applications drawer by tapping the application icon in the middle of the toolbar along the bottom of your screen.
how to customize the HTC one (3)
From the app drawer scroll until you see the Camera application. Depending on how you’ve configured your device, all of your applications are likely sorted in alphabetical order, so look for it around where other apps that start with the letter ‘p.’
The camera application is also located on the right-hand side of the toolbar on your device. It’s the application represented by a blue and white camera.
How to Take a Slow Motion Video on the HTC One (4)
Tap the three dots on the top left hand corner of the camera view finder.
How to Take a Slow Motion Video on the HTC One (5)
Scroll down in the camera menu until you find the video capture settings. Tap Scene Setting from the Video capture menu.
How to Take a Slow Motion Video on the HTC One (2)
Tap slow motion video from the drop down menu.
Tap the video capture button on the bottom of your camera application to capture your slow motion video.
As long as the icon shows a person running in slow motion, all of the video you capture will be in slow motion. You can head back into the camera settings menu to deactivate slow motion video by repeating these steps.
The next time you open the Camera application, the camera would have automatically reverted back to its normal video settings.

How to Customize BlinkFeed on the HTC One and Sense 5

Never one to turn away from a trend, HTC has attempted to simplify the way users find the things they care about on its smartphones running the new Sense 5 skin for Android using the BlinkFeed interface on every HTC One’s home screen. Here’s how to customize BlinkFeed on the HTC One and have it display more of the information that’s important to you and how you use your device.

Choose and Remove News Sources & News Categories

Unlock your HTC One. By default you’ll be greeted by the HTC One’s default Sense 5 home screen.
how to customize the HTC one (1)
Pull down on the top square of your BlinkFeed timeline with your finger. This will reveal a small toolbar above your BlinFeed timeline.
Tap the three dots in the menu that you’ve just revealed. They are located on the far right corner in the toolbar you just revealed.
how to customize the HTC one (2)
Tap the topics and services menu from the drop down menu on the right side of screen.
how to customize the HTC one (3)
To choose what sources BlinkFeed pulls featured news stories from, tap the check box that corresponds to each news source. In the screenshot below, we’ve selected Reuters as a news source we’d like to get featured headlines from.
how to customize the HTC one (4)
To add or remove entire categories of news posts based around your interests, swipe from the right to the left side of the screen to navigate to Topics and Services.
how to customize the HTC one (5)
Add any topic you like by tapping on it, or remove topics that are already featured by tapping on them.

Choose and Remove Apps and Social Networks

By default, BlinkFeed will pull down information from the social network accounts that you entered when you set up your HTC One.
Unlock your HTC One. By default you’ll be greeted by the HTC One’s default Sense 5 home screen.
how to customize the HTC one (1)
Pull down on the top square of your BlinkFeed timeline with your finger. This will reveal a small toolbar above your Blinkfeed timeline.
Tap the three dots in the menu that you’ve just revealed. They are located on the far right corner in the toolbar you just revealed.
how to customize the HTC one (2)
Tap the Topics and Services menu from the drop down menu on the right side of screen.
how to customize the HTC one (3)
Inside the Topics and services menu, swipe from left to right with your finger for the Services and Apps menu.
how to customize the HTC one (6)
Tap to add or remove the social networks that you would like Blinkfeed to pull information from. For this example, we’ve told our HTC One to not add information from LinkedIn to Blinkfeed. Tap on the cog icon on the right side of each social network to add that account or change the password that Sense 5 users to pull information from that account.
This menu will also allow you to change that apps that have access to your BlinkFeed display. For this example we’ve given all of our apps that have the ability to connect with BlinkFeed, to activate or deactive them, tap their names. This list of apps is located on the bottom of the Services & Appsmenu.
how to customize the HTC one (7)
You’ve now customized the BlinkFeed interface on your HTC One or other HTC device running Sense 5. With your device only showing you the things you care about, it should be much easier to find the status updates and news that are most important to you.

Using Siri in a MyFord Touch-equipped Vehicle

Apple made news recently at their annual Worldwide Developer Conference (WWDC) byannouncing that their Siri Eyes Free system was to be expanding to because a full Siri in the Car experience. Notably absent from this announcement and current Siri Eyes Free support is Ford. Even though there is not official Siri support built into MyFord Touch, Siri does work with the MyFord Touch system. While not as completely seamless as General Motors’ system, MyFord Touch does provide full Siri support.
If the Siri-equipped iOS device is already paired to MyFord Touch through the Bluetooth interface, then the driver is ready to take full advantage of the Siri experience.
Siri
Ford’s MyFord Touch infotainment system.
Because there is no Siri button on Ford vehicles, the driver must press the Home button on the iPhone and hold it for a couple of seconds to activate Siri. Once Siri is activated, the MyFord Touch-equipped vehicle will treat that voice conversation as a phone call. The radio will mute, the system will change to phone mode and the driver’s phone number will appear on the screen. The system automatically establishes a two-way link to Siri, and over the speakers the driver will hear the beeps indicating Siri is ready for a command.
Siri’s response from the voice command will be heard throughout the cabin in the same way a phone call would be heard on speakerphone. Since Siri is still active on the phone, the vehicle maintains the voice link to Siri (keeping the radio muted). To issue a follow-up command, the driver just needs to hit the Siri activation button again. The driver will immediately hear the prompt beeps, and then actively listen for a command.
Using the system this way does introduce a few additional elements in the voice command system. First, instead of using the iPhone’s built-in microphone, the system is relying on the MyFord Touch microphone in the vehicle. Based on recent testing, the microphones used in Lincoln vehicles seem to be of better quality (or utilize noise cancellation) than the ones in Ford vehicles.
Also, when a vehicle is moving it is not necessarily always in a good reception area. In low signal coverage areas, Siri may take an extended period of time to process the request, or it might fail at the request altogether.
Lastly, the driver must have access to the Siri activation button. That typically means having the phone in the driver’s pocket or upside down in a cup holder. Because it is not on the steering wheel, it does create another potential distraction point.
Despite the negatives, we have used Siri with MyFord Touch in the past and find it useful, albeit not perfect. Luckily, it appears Ford is working on embracing iOS 7 in their vehicles in the near-future.

GOOD MORNING


Sunday, 4 August 2013

WARREN BUFFETT INTERVIEW FROM INDIA


Story of Dhirubhai Ambani


Motivational - Bill Gates Speech at Harvard


YOU AGAINST YOURSELF


Les Brown - What do you deserve? You deserve the BEST!


Android 4.3 Breaks Compatibility With Many Bluetooth Keyboards

There's no denying the usefulness of a keyboard when doing a lot of text input on Android, and there's no shortage of Bluetooth options that fit the bill perfectly. Anyone who spends a lot of time in email or a text editor likely has one of these handy little accessories laying around, but if that user also owns a Nexus device with 4.3, then they're in for a bit of a surprise the next time it's paired up: many Bluetooth keyboards no longer work post-update.
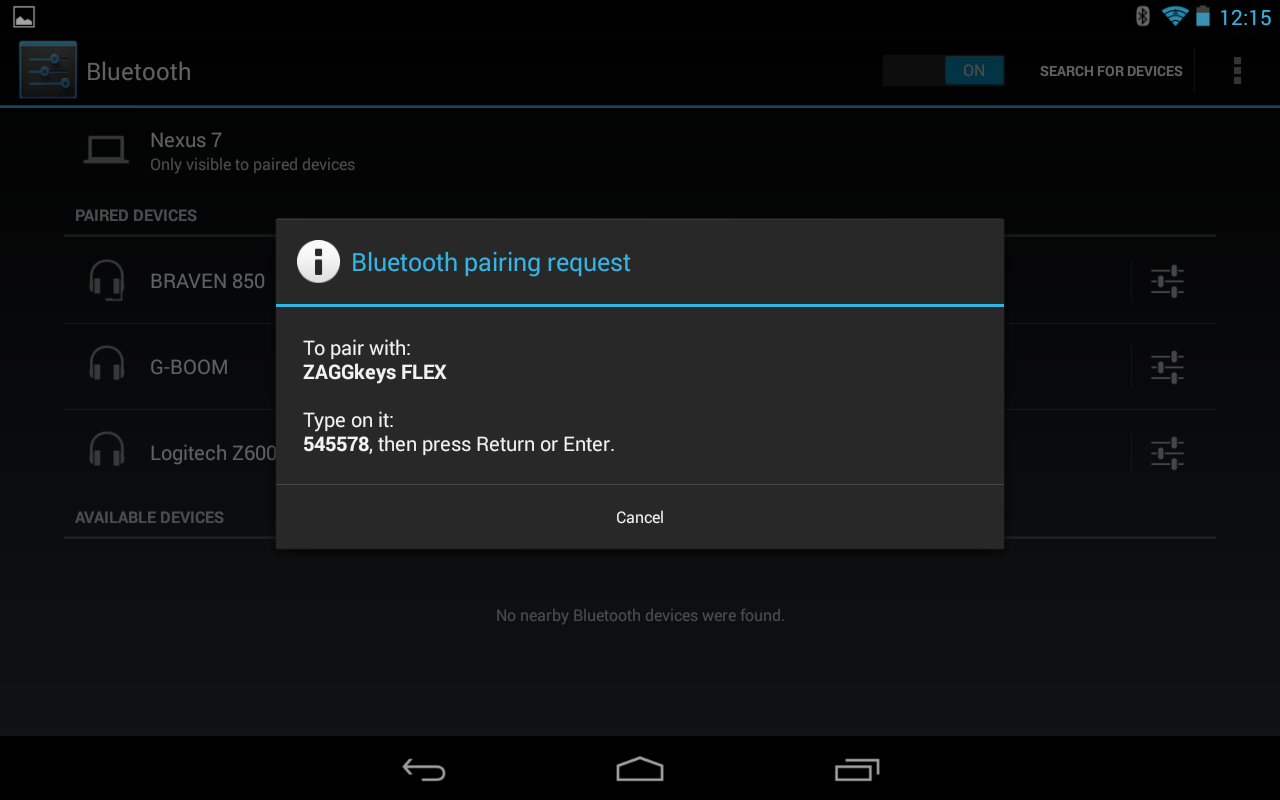
Screenshot_2013-08-02-12-15-08 Screenshot_2013-08-02-12-15-28 Screenshot_2013-08-02-12-15-45
We first got wind of this issue through a tip from reader Tom Henriksen, who cited several different forum posts as proof that this is indeed a verifiable issue. To confirm, I grabbed two different Bluetooth Keyboards (ZAGGkeys Flex and Logitech K810) and paired them both up with my 2012Nexus 7, Nexus 10, and Nexus 4 – all of which are running 4.3. Both keyboards pair correctly and accept the input code, but past that, the results are quite interesting. The ZAGGkeys Flex – a keyboard designed specifically for mobile (Android or iOS) – doesn't work at all, regardless of whether it's in Android or iOS mode. The Logitech K810 – which is designed for Android, iOS, and/or Windows – works without issue.
Screenshot_2013-08-02-12-27-59 Screenshot_2013-08-02-12-28-26
At this point, it's unclear what has caused the keyboard incompatibility issues, or which keyboards may actually work. So far, a handful of keyboards have been noted as incompatible: Zagg, Apple, Spider, Kensington, and GYMLE, just to name a few. There's no conclusive list right now, so it's best to just try it out and see if yours works. If you're in the market to buy one, however, it's probably best to wait until Google rolls out a fix. Otherwise, the only other option is to either forgo the 4.3 upgrade or roll back to 4.2.2 using the Nexus factory images; unless you have a 2013 Nexus 7, in which case you'll just have to wait it out and hope Google pushes a fix in a timely manner.
Note: Two bugs have already been filed. No response from Google at this time.
Thanks, Tom!